Playschool Scrapbook Layout
To create this Playschool scrapbook layout page, you certainly get plenty of Scrapbook supplies in the StoryTellers Club kit.
The supplies all come in a handy, zip top case which helps keep all the kit pieces together, especially useful once you have dived in and started playing with everything!
When you want to go back and do another page with the supplies (StoryTellers advise that there is enough product to create between 10 and 12 pages), they can all be kept together.
Supplies - Playschool Scrapbook Layout
Here is a list of scrapbook supplies included in this play school Scrapbooking Kits, courtesy of Storytellers club.
|
|
The card toppers were probably my least favourite part of the kit as although pretty, they seemed a little flat. However, they lend themselves very well to a little alteration with items such as ribbon or stickles, and this would add the little bit of dimension I felt it lacked.
There are a good variety of colours in the choices included form the more subtle to brights so whatever your style you are sure to find something to suit.
|
Prev Next 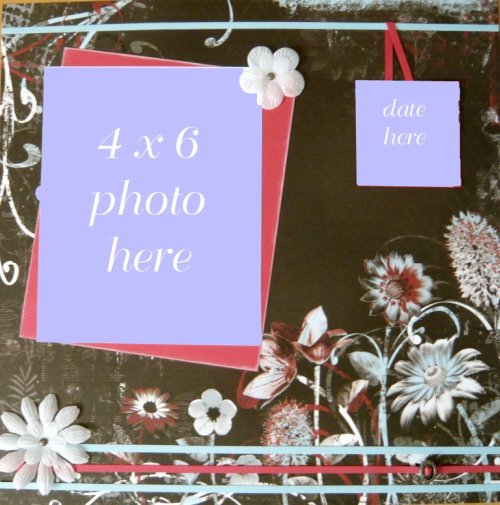 |
Scrapbooking Kits - Courtesy Storytellers Club Scrapbook by: |
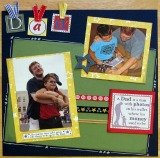
Instructions: How to make a Playschool Scrapbook Layout
- Cut a photo mat, slightly bigger than your photo from the red cardstock.
- Edge mat with white ink
- Mount the mat at an angle onto the flowery side of the patterned paper from the kit.
- Adhere your photo level onto the red photo mat.
- Cut 1 thin strip of red cardstock
- Cut 3 thin strips of blue cardstock
- Thread the metal charm onto the red strip and place it ¾ of the way along it.
- Leaving one blue strip aside, adhere the other strips alternately onto the bottom third of the layout
- Take the white flowers and secure one set onto the photo mat and one set onto the left hand side of the 3 strips with silver brads
- Cut a few more thin strips from both shades of cardstock. Take the tag from the kit and cover the edges with the strips of card.
- Take one small strip of red cardstock and attach it to either side of the tag, so that it hangs, using a small amount of glue.
- Thread this hanging tag onto the remaining blue strip and then adhere the whole thing to the top third of the layout, above the photo.
- Add your journalling to the tag.
And that's is it!
Check other reviews in the Storytellers Scrapbook Supplies Reviews and Gallery
Scrapbooking Ideas Layouts Gallery
Remember scrapbooking ideas is limited only to your own imagination. We are all unique and have different lives, careers, hobbies, experiences etc from others.
Capitalize on your uniqueness and turn it into your own unique scrapbooking pages.
Subscribe To Newsletter
All scrappy ideas
It keeps you informed about unique themed scrapbooking ideas, free layouts, Product reviews, supplies, tips, information etc.
Or you can even share your ideas, suggestions feedback etc that will help us improve our scrapbooking experience.
Scrapbook Contest
Win Huge Prizes participate in our Scrapbook Contest, It's easy and fun.
Related Pages
Affiliated Links


